
Welcome to Longhorn Masonry Repair.
We fix ugly masonry repairs with properly matching mortar. Get brick repair done right, the first time....or
Call Longhorn Masonry Repair to fix it.
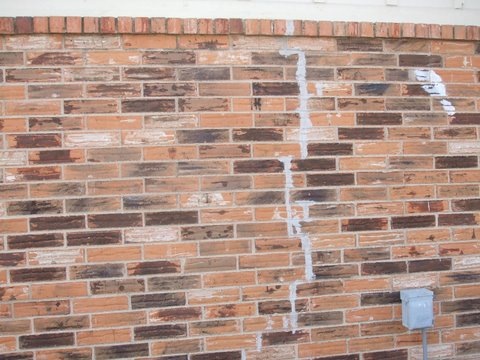
When you have settling cracks in your brick walls, you need to get them repointed. This process is known as tuck pointing. However, before you make any attempts at repairing this yourself or hiring the repairs done by a contractor or handyman, you should know the top ten most common mistakes made in repointing mortar.
Mortar Match Test
test provides accurate usable data about the mortar and provides a detailed mortar formula
The first mistake is having the repairs made before checking for
additional problems. Repairing the cracks in the mortar and brick
before checking the foundation or other problems that occur can result
in more damage to your home and to your masonry siding.
Settling cracks occur due to the foundation settling and applying
stress to the bricks. This makes them a common symptom of
foundation
repair and can help in understanding where and how much movement of
the foundation has occurred.
To tuck point the mortar and replace broken brick along these settling
cracks limits the ability to accurately repair the house foundation.
Performing these repairs often results in damage to the brick walls
when the foundation is repaired. Any mortar or bricks placed in these
cracks to fill the gap become a wedge and force the opposite crack to
form in the area and the brick tend to push out at corners of the
house causing brick walls to crack, lean away from the house, or come
off the foundation entirely when the house is lifted.
It cannot be stressed enough to check for other problems with the
structure or foundation of the home before repairing mortar cracks.
The second most common mistake made in fixing settling cracks in brick
is choosing a
foundation repair company
to level your foundation. There is a difference between leveling your
foundation of your house and fixing your foundation problems.
There has never been a house foundation built perfectly level that I
am aware of, and to level the foundation under your house would apply
stresses to your home and cause more problems with your foundation.
This in turn would create more cracks in the bricks and mortar joints
around your home. When they stress the word level and use a
computerized level for their readings, it is a strong indication that
they intend to try leveling your foundation even if it causes more
problems. If they focus on lifting, stabilizing, adjusting, and use
the cracks in the mortar and brick to acquire their range of movement
in the house slab, then they are likely taking more accurate details
about the movement and have a better chance at providing quality
foundation repair services.
The third common mistake in brick repair is using these tubes of
mortar repair caulking in an attempt to repair the cracks yourself.
While caulking is used around doors and windows and in expansion
control joints to seal the wall and still allow movement, they are not
intended for use as the mortar and can cause other damage to the
brick.
The caulking will never look like the mortar and tends to be difficult
to clean off of the faces of bricks due to their texture. The same is
true of many other masonry repair
products. They contain adhesives,
epoxy, and other add mixes that can be hard to work with and difficult
to remove. It often requires removing all of the brick in areas where
these products are used to repair the brick. If you want to repair the
mortar cracks yourself, you should use a proper repointing mortar with
the same composition as the original. These are not bulk items they
are custom made for matching your mortar composition, and require a
mortar matching analysis of your existing mortar samples.
The fourth
masonry repair mistake is how you match the mortar. This is
not to be confused with matching mortar color.
Mortar matching is the
process of analyzing samples of the mortar to identify their
composition, performance, and formula. As the color of sand and other
materials in the composition effect the color, they are related, but
the base formula of a mortar composition must be matched before any
attempts are made to match the color of an existing mortar.
The
mortar composition and formula are the guide to making a proper
repair mortar and maintaining the formula. This is important because
if the mortar is mismatched and has a different composition than the
original mortar, it can have complications that make the color more
difficult to match, cause damage to the bricks, prevent the new mortar
from bonding with the old mortar, and could allow the wall to fall if
the mortar crumbles.
The fifth most common mistake in repairing masonry is
matching mortar
color. Most of the time the
mortar composition analysis of the
original mortar is skipped and general assumptions are made in its
place. This causes difficulty in matching mortar color because the
color is a direct result of the composition and the ratio of materials
in the mortar mix. To match the color of a mortar, you need to first
match the formula and composition of the existing mortar.
After you have the base formula and composition, you can adjust the
mortar color by adjusting the colors of base materials and adding
pigments as needed. However, a common error is adding pigments or
other materials too fast or changing the formula base. You must adhere
to the base formula to maintain the performance and type of mortar
being produced, and remember to add all portions slowly as you can
continue to add but are unable to take anything back out.
In
masonry repair, the
sixth common mistake is the depth of repairs. A patch or bandage covers the top of a problem, but to repair the
cracks, you need to remove some of the existing mortar. It needs to be
removed to a depth that allows for a good bond of the new mortar to
the old mortar and the bricks. This will help to ensure a lasting
masonry repair. Generally, a good depth is about 1/2-3/4 of an inch
deep into the mortar joints. More is better especially when the gap
allows you to replace the entire mortar joint.
The seventh item where errors occur is in
preparing the cracks for
repointing. Dust and debris remaining in the cracks prevent the new
mortar from bonding to the old cement and prevent the mortar joints
from filling completely. It is important to brush away any loose
debris or dust and rinse and moisten the old mortar. This will help
the new mortar bond to the existing mortar.
The eighth mistake commonly made is in
mixing the mortar. Too often,
water is added rapidly and exceeds the amount needed and attempts are
made to adjust this. The most common attempt to correct this problem
is to add sand or mix to the mortar. When you do this, the composition
formula is changed and the resulting mortar will not meet your
requirements.
If you add too much water, you must add more of the
entire composition materials based on the formula to adjust this
without changing the ratio and mortar type. It is best to add water or pigments slowly as
you cannot remove them, and when mistakes like this occur, you might
be better to dispose of the mortar and start again.
The ninth most made error in
tuck pointing is filing the mortar joint
completely. When filing the mortar joints, they may look full, but
they must be packed in to the mortar joints tightly. Dust and debris
can prevent this and should be cleaned out before installing new
mortar.
When mortar joints are not filled completely, they tend to crumble
when pressure is applied. This is often noticed during tooling the
mortar joints if the mortar has began to stiffen in the wall before
jointing or tooling takes place. If this is noticed, remove the mortar
where it occurs and replace it again. Also, remember that begin to
stiffen does not mean let it get hard before tooling the joints.
Applying pressure to dry mortar that hasn't cured will cause cracking
or crumbling of the mortar and will need replaced again.
And the tenth most common mistake in brick mortar repair is tooling
and brushing the mortar joints. As I previously mentioned, tooling
must be done as the mortar begins to stiffen but before it gets too
hard for tooling. However, when tooling the mortar, it is important to
match the existing type of tooling. There are all different designs
for the tools that shape the mortar joints. The most common design is
a rounded or raked mortar joint. You will want to use a jointing tool
that produces the correct design and size of mortar joint. These tools
come in wider angles for thicker mortar joints.
This is important to making the repairs blend into the wall. Using a
jointer that doesn't match will cause the mortar to cast a shadow at
the intersections of new and old mortar. This also occurs with the
mortar tags or excess mortar that are pressed out furring tooling. You
must brush the excess away and blend the edges of each and every
mortar joint to make the repairs match properly.
As you can see,
masonry repair is a very detailed process where slight
variance of any detail significantly changes the out come of the
repairs.


